
Jabber Server

News |
Introduction |
Transports |
Server Features |
Jabber Clients |
Using the Quadronyx Jabber Server |
Registering an account |
Account Information |
Adding a user (friend) |
Registering with Services |
AIM (AOL Instant Messenger) Transport |
ICQ Transport |
MSN (MSN Messenger) Transport |
IRC (Internet Relay Chat) Transport |
Emoticons (Jisps)
News
IntroductionJabber is an increasingly popular Instant Messenger (IM) protocol. Unlike proprietory protocols like those used by MSN Messenger, Yahoo Messenger, ICQ and AOL Instant Messenger (AIM), Jabber is completely open and as of October 2004, an IETF accepted standard (under the name XMPP).For more information regarding Jabber and XMPP, see: The Jabber protocol is decentralised which means that any Jabber user, connected to one Jabber server, can communicate with another Jabber user, connected to a completely different Jabber server. This means you're not locked in to any one Jabber server. TransportsOh great, not ANOTHER Instant Messenger program required on my system! Nope, not so! The Quadronyx Jabber server offers the benefits of various transports.Transports run on a Jabber server and allow you to communicate with OTHER networks. Simply registering with the appropriate transport will then allow you to communicate with all your friends on other networks, all through the one client. For Jabber users, a transport is not necessary. Additionally, Google chose Jabber for their IM protocol, meaning you don't need a special transport to talk to your GoogleTalk friends either! Server FeaturesThe Quadronyx Jabber server supports various features and is continually having new ones added. Jabber clients that have "Service Discovery" will allow you to see a complete list of server features.Some of the more interesting features are:
Jabber ClientsIn order to start using a Jabber server (such as the Quadronyx Jabber server), you will need a Jabber client. Due to Jabber being the open protocol, there are MANY clients to choose from, unlike the proprietory protocols and clients. Some available clients are:
Using the Quadronyx Jabber ServerOnce you've chosen a Jabber client, you can connect to the server and start communicating with everyone. The servers address is: jabber.quadronyx.com.au.The Quadronyx Jabber server uses SSL for communications to ensure that everything transmitted is encrypted. You will find that the certificate is signed by CA Cert (http://www.cacert.org/). If CA Cert is not in your list of trusted root certificates, you will recieve a warning. This can be safely ignored. The Quadronyx Jabber server is maintained by Krayon. Feel free to forward any requests you have to him. He can be contacted at the XMPP address: admin@jabber.quadronyx.com.au Registering an accountThe following instructions will help you in registering a new account with the Quadronyx Jabber server. It assumes that you have not used Jabber at all and that you have only just installed a Jabber client. These instructions will cover the client called PSI however they should work for other clients with minimal changes.PSI allows you to easily register an account the first time you run it. Start PSI now and you should be presented with a Psi: Add Account dialog (see figure 1). If not you can click the Add button from the Psi: Jabber Accounts dialog (accessed by selecting "Account Setup" from the main PSI menu). 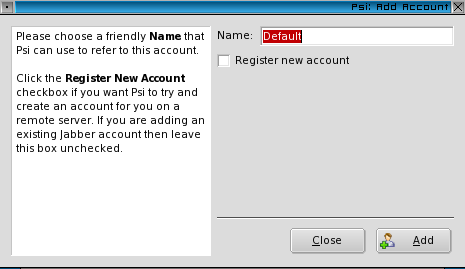 figure 1 In the Name field, type the name that you want to assign to the account. Note that in PSI this name is only used to refer to the account internally and in no way has to match your display name etc. Some clients DO use this name as the basis for your display name however. Also ensure that you check the Register new account checkbox. Once you have done this, click the Add button (see figure 2). 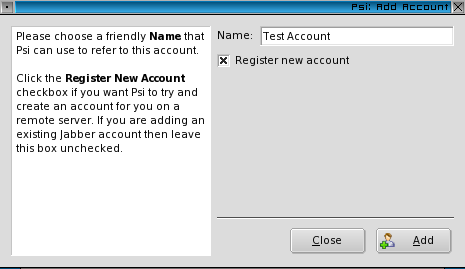 figure 2 You should now be presented with the PSI: Register Account dialog (see figure 3). 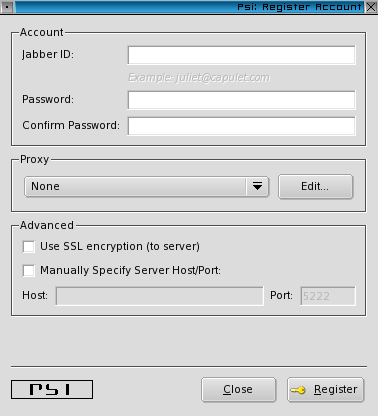 figure 3 Your Jabber ID is in a format not unlike an e-mail address: a username that is selected by you, followed by an at symbol (@), and finally the Jabber server address - in our case the Quadronyx Jabber server address is jabber.quadronyx.com.au. As far as the username is concerned, it's up to you. It can be anything you like as long as it isn't already taken. In the example case, we've allocated the username test. You will also want to enter a password into the Password and Confirm Password boxes. Finally, ensure that the Use SSL encryption (to server) checkbox is checked. In order to ensure that your conversations cannot be snooped on, monitored or logged in any way, the Quadronyx Jabber server ONLY supports SSL encrypted communications (see figure 4). Note that while communications between the Quadronyx Jabber server and it's clients are completely encrypted, this does not mean that your conversations with other people are fully encrypted end-to-end unless they too are using encryption. Note that protocols such as Microsoft's MSN Messenger, ICQ and others do not support encryption. 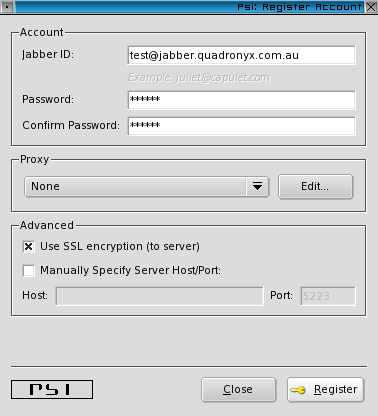 figure 4 If you have to make Internet connections through a proxy, you will need to configure this also. To do this, click the Edit... button in the Proxy section. This will bring up the PSI: Proxy Profiles dialog where you can enter your proxy information (see figure 5). 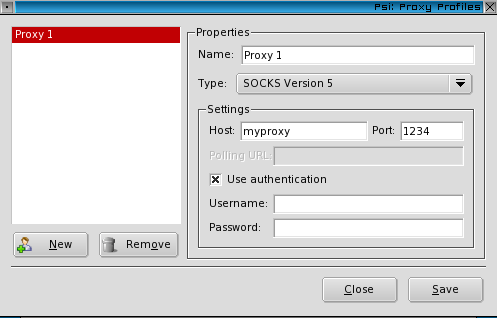 figure 5 Once all this is done, you can click the Register button. If all goes according to plan, You should get a Success dialog like figure 6. 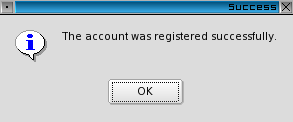 figure 6 Account InformationAfter connecting with your new account, you will receive an error stating that PSI was "Unable to retrieve your account information". The dialog that also appears, will allow you to enter them (see figure 7).If you are not presented with an account details dialog, you can access it by opening the Psi: Jabber Accounts dialog (accessed by selecting "Account Setup" from the main PSI menu), clicking the Modify button, selecting the Details tab, and finally clicking the Edit Personal Details button. Enter your Full Name and Nickname in this dialog, and Birthday, Phone number, Homepage and E-Mail if you wish. You may also want to enter details into the Work, Location and About tabs, however these are completely optional. Once you are done, you can click Publish, and then Close to finish. 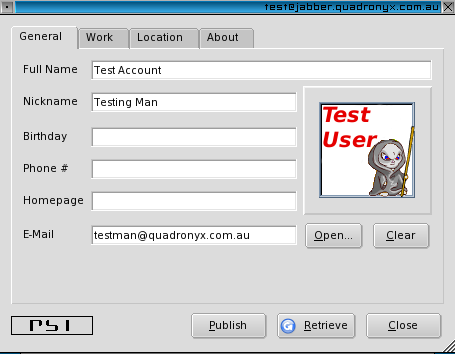 figure 7 Adding a user (friend)You can add a friend to your Jabber account from the Psi: Add User dialog, displayed by selecting your account from the Add a contact sub-menu of the main PSI menu.The Psi: Add User dialog will be displayed (see figure 8), where you can enter the Jabber ID of the user you are adding, along with an optional Nickname and Group. Ensure that "Request authorization when adding" is checked so the user can add you too! 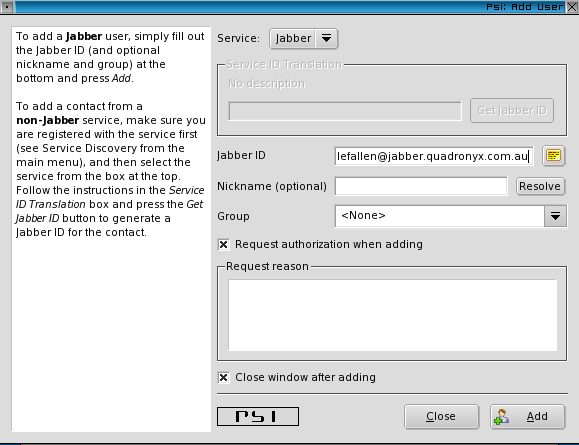 figure 8 When someone adds you to their Jabber Account (or they accept your request) a System Message will appear, informing you that the user wants to subscribe to your "presence" and asking if you would like to add and authorize them (see figure 9). Click the "Add/Auth" button to do this. 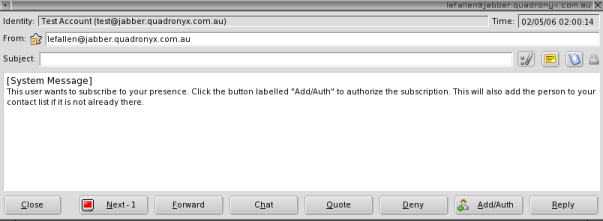 figure 9 After both you and your friend have authorized each other, a dialog will be displayed to inform you that the process is complete (see figure 10). 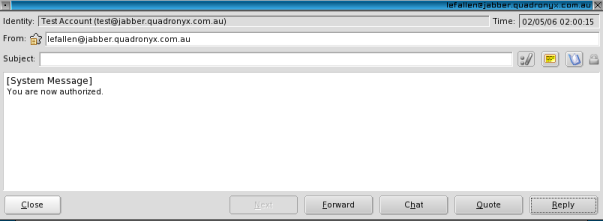 figure 10 Registering with ServicesYou can register with the server's services by selecting the appropriate service from the Service Discovery. This is accessed by selecting your account from the Service Discovery sub-menu of the main PSI menu.In the Psi: Service Discovery dialog (see figure 11), right-click the service you want to register with, and select Register. A slightly different dialog will be displayed for each service, and most are self explainitory. 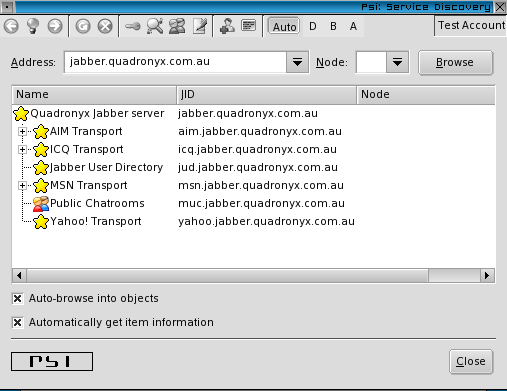 figure 11 After a successful registration occurs, a Registration successful dialog will appear, similar to figure 12. 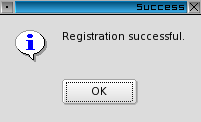 figure 12 AIM (AOL Instant Messenger) TransportWhen registering with the AIM transport, you must enter your AIM screen name and password into the registration dialog that appears (see figure 13).After registration, the success dialog (as figure 12 above) should be displayed. If you do not have an AIM screen name already, and you ABSOLUTELY need one, you can get one from here: http://www.aim.com/. Of course the better thing to do would be encourage your friends to use Jabber instead ;) 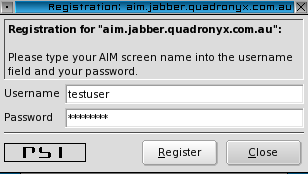 figure 13 ICQ TransportWhen registering with the ICQ transport, you must enter your ICQ user id number and password into the registration dialog that appears (see figure 15).After registration, the success dialog (as figure 12 above) should be displayed. If you do not have an ICQ user id already, and you ABSOLUTELY need one, you can get one from here: http://www.icq.com/. Of course the better thing to do would be encourage your friends to use Jabber instead ;) 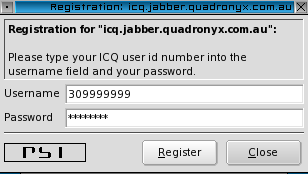 figure 15 MSN (MSN Messenger) TransportWhen registering with the MSN transport, you must enter your MSN passport and password into the registration dialog that appears (see figure 17). The passport is usually the email address you registered for MSN with.After registration, the success dialog (as figure 12 above) should be displayed. 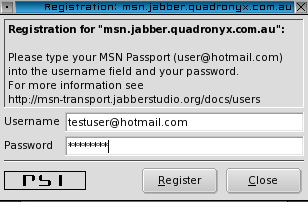 figure 17 IRC (Internet Relay Chat) TransportTo use the IRC Transport, you just need to connect to the chatroom using the format #CHANNEL%SERVER@irc.jabber.quadronyx.com.au where #CHANNEL is the channel you want to join on the server SERVER. Exactly how you do this will differ client to client but in PSI, you simply select Join Groupchat from the menu. You will then be presented with the Join Groupchat dialog (see figure 18).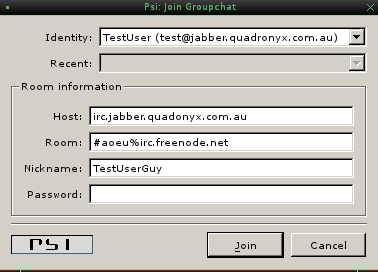 figure 18 In figure 18 above, we have entered the IRC transport as the host (irc.jabber.quadronyx.com.au), the channel and server, separated by '%', as the room (#aoeu%irc.freenode.net), as well as our desired Nickname. Now we can click Join. After a short delay, we should be connected to the network, and in the desired channel (see figure 19). 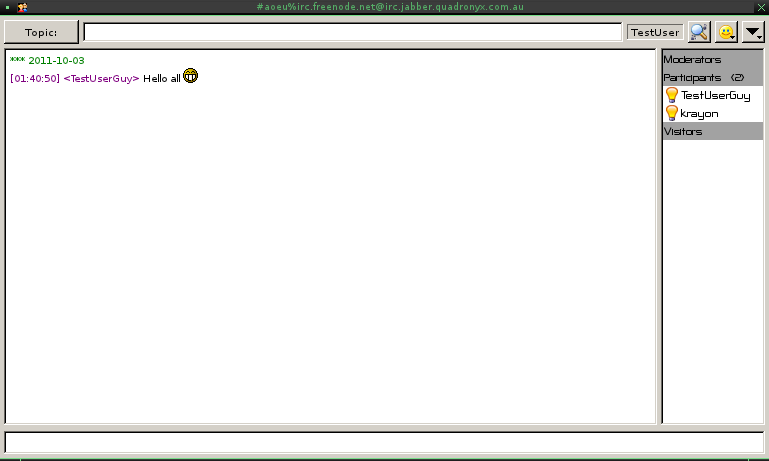 figure 19 If the IRC network uses NickServ (eg. FreeNode), and you have a registered account on the server in question, you can get the Jabber server to authenticate you automatically. To do this select Service Discovery from the PSI menu. The Service Discovery dialog will display (see figure 20). 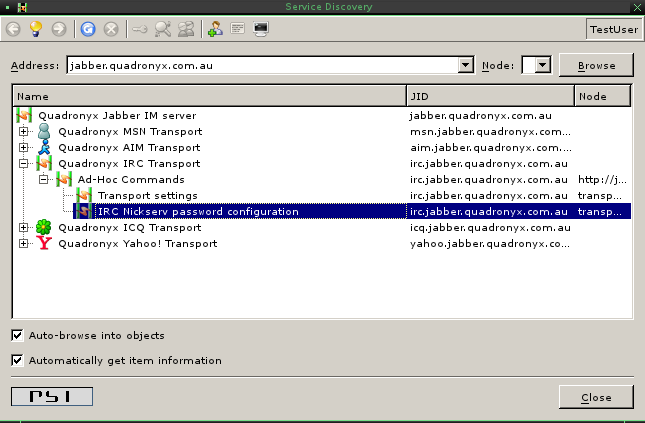 figure 20 In order to set the password, expand the Quadronyx IRC Transport, then Ad-Hoc Commands and finally, double-click IRC Nickserv password configuration. This should display the dialog below (figure 21) where you can simply provide your password. 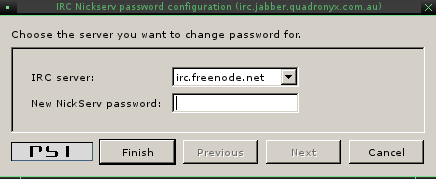 figure 21 |
![iHerb, Trusted Brands, Healthy Rewards, $10 off first order! [ http://www.iherb.com/?rcode=HBN436 ] Image: iHerb, Trusted Brands, Healthy Rewards, $10 off first order! - http://www.iherb.com/?rcode=HBN436](/badges/iherb.200x60.png)
|
|
|
![Pale Moon, Your browser, Your way [ http://www.palemoon.org/ ] Image: Pale Moon, Your browser, Your way - http://www.palemoon.org/](/badges/palemoon.640x134.png)
|
Last updated: 2012-02-19 11:22 UTC